[Contents] [Previous] [Next]
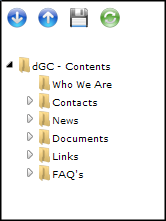
(fig 2.1) dGC Tree
 Open all nodes of the Tree
 Close all nodes of the Tree
 Save Tree(no available)
 Refresh Tree
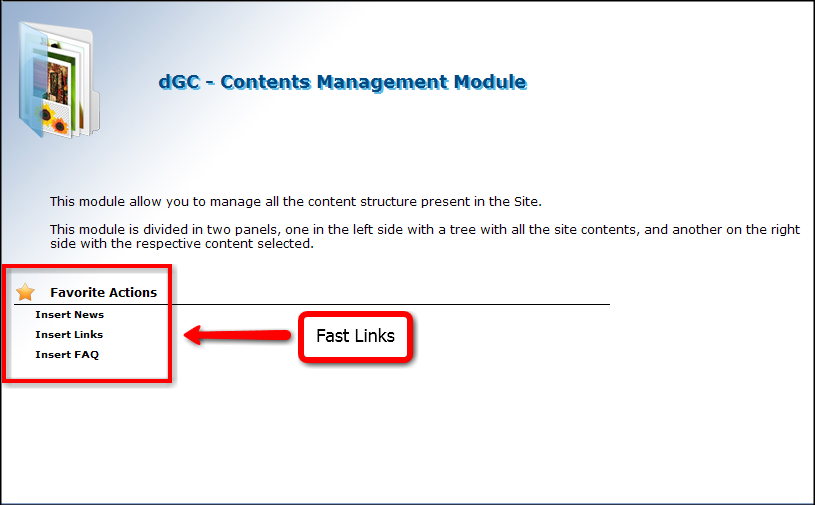
(fig 2.2) dGC Content Area
Example how to change the information on Who We Are content.
Example how to insert a new image on Who We Are content.
Example how to delete an image on Who We Are content.
Example how to insert a new file on Who We Are content.
Example how to delete a file on Who We Are content.
Example how to change the information on Contact content.
Example how to add a new Sub-Group to Contact content.
Example how to change a Sub-Group information on Contact content.
Example how to delete a Sub-Group on Contact content.
Example how to create a new contact on a Sub-Group.
Example how to change a contact information on a Sub-Group.
Example how to delete a contact on a Sub-Group.
Example how to create a new news on News content.
Example how to change a new news on News content.
Example how to delete a news on News content.
Example how to insert a new image on News content.
Example how to delete an image on News content.
Example how to insert a new file on News content.
Example how to delete a file on News content.
Example how to create a new 1st level of documentation on Documents content.
Example how to change 1st level of documentation on Documents content.
Example how to change the order of appearence of the 1st level documentation on Documents content.
Example how to delete 1st level of documentation on Documents content.
Example how to insert a document on 1st level of documentation on Documents content.
After uploading the file, the Manage Permissions button will appear (fig 2.3).
When you click on it, the list of customers from the country selected will appear. There will be 2 tables, "Selected Customers" (fig 2.4) and the "Unselected Customers" (fig 2.5).
By default, when you upload the file, it will be selected to all customers.
If you need to be associated to just 1 customer, just send all the others to the unselected table.
The management can be done by selecting the customer and clicking on to send them to the "Unselected Customers", or clicking on to send them to the "Selected Customers".
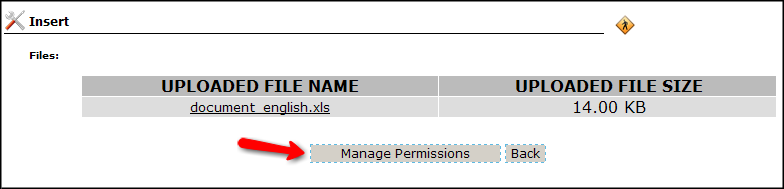
(fig 2.3) Manage Permissions Button
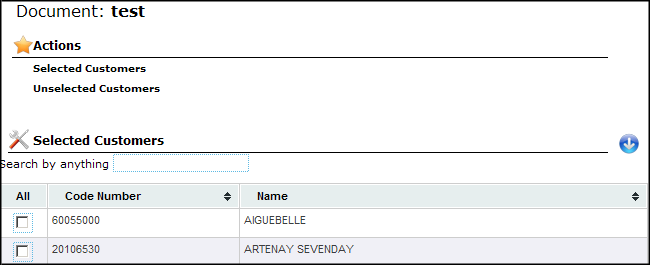
(fig 2.4) Manage Permissions Button

(fig 2.5) Manage Permissions Button
Example how to manage permissions for the uploaded file.
Example how to delete a document on 1st level of documentation on Documents content.
Example how to create a new 2nd level of documentation on Documents content.
Example how to change 2nd level of documentation on Documents content.
Example how to change the order of appearence of the 2nd level documentation on Documents content.
Example how to delete a document on 2nd level of documentation on Documents content.
Example how to insert a document on 2nd level of documentation on Documents content.
Example how to change the order of appearence of the 2nd level documents on Documents content.
Example how to manage permissions for the uploaded file.
After uploading the file, the Manage Permissions button will appear (fig 2.6).
When you click on it, the list of customers from the country selected will appear. There will be 2 tables, "Selected Customers" (fig 2.7) and the "Unselected Customers" (fig 2.8).
By default, when you upload the file, it will be selected to all customers.
If you need to be associated to just 1 customer, just send all the others to the unselected table.
The management can be done by selecting the customer and clicking on to send them to the "Unselected Customers", or clicking on to send them to the "Selected Customers".
(fig 2.6) Manage Permissions Button
(fig 2.7) Manage Permissions Button
(fig 2.8) Manage Permissions Button
Example how to delete a document on 2nd level of documentation on Documents content.
Example how to create a new link on Links content.
Example how to change a link on Links content.
Example how to delete a link on Links content.
Example how to insert a new image on Links content.
Example how to insert an image on Links content.
Example how to create a new Question/Answer on FAQ's content.
Example how to change a Question/Answer on FAQ's content.
Example how to delete Question/Answer on FAQ's content.
[Contents] [Previous] [Next]